We’re living in the golden age of product photography for entrepreneurs. It has never been easier to take your own high-caliber photos and showcase them to the world.
To set the context, let’s review the 4 main eras of product interfacing in the past 125 years of business. First came the catalogs of the late 1800s, allowing customers to see basic illustrations or photos of the latest products. It didn’t matter if you lived in a metropolitan area or a smaller town, as long as you got the mail, you had equal access to product information.
Next came the expansion of brick-and-mortar locations. Catalogs still existed, but there was a strong chance that you had a mall and a bevy of other businesses in your area. So customers began to rely on the tactile advantages of viewing products in person. Not only could you see what a product looked like, but you could evaluate its heft, quality, and design.
The third era was ushered in by the emergence of ecommerce in the early 1990s. The value of seeing products in person was superseded for many customers by the incredible convenience of browsing from a personal computer. Fewer people wanted to walk around a mall searching for products when they could kick back on the couch and price check items with the click of a mouse.
Product photography took on a heightened level of importance in this third era, as it combined the convenience of shopping from a catalog with the ability to scrutinize a product that customers relied on in the brick-and-mortar era. A simple illustration wouldn’t suffice, as customers wanted to see engaging, beautiful, and detailed photos.
To produce these images, professional photographers mainly used DSLRs (digital single-lens reflex cameras) and other digital cameras. Some still shot with film, but the convenience of digital gradually took over, perfectly mirroring the greatest claims of the ecommerce era.
The good news is that even if you’re not a professional photographer, you now have the ability to take top-grade photos of your products. Because we’re now in the fourth era of product interfacing, the previously mentioned golden age, which is huge news for entrepreneurs.
The Fourth Era: The Democratization of Product Images
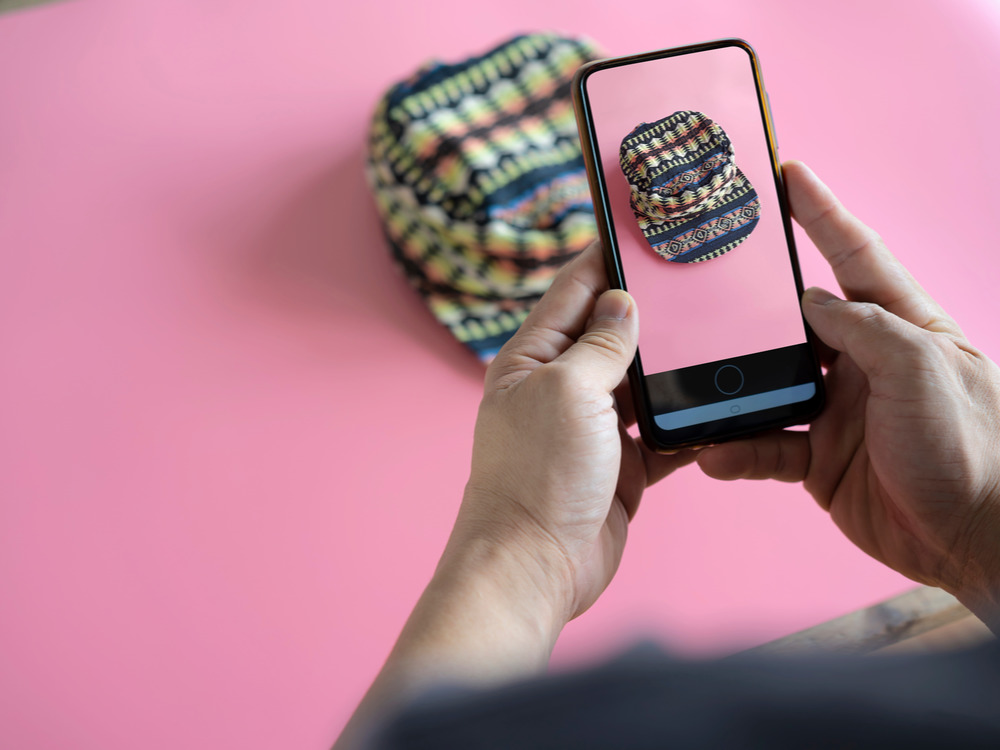
Customers still want high-quality photos to help them evaluate ecommerce products, but you no longer need to hire a professional photographer to capture (greatly reducing the burden of product photography pricing). Because the iPhone or Android device in your pocket is basically the best camera for product photography, given its user-friendly features and advanced capabilities.
All you need are the product photography ideas, as our modern era provides user-friendly technology that allows every entrepreneur in the world the chance to take their own photos with a smartphone. Additionally, you have website-building tools that make it simple to customize and edit product photos on your site in a visually stunning way.
This guide will share practical tips and advanced strategies for capturing the best images of your products so you can stand out from the crowd and help your consumers visually connect with your product.
Product Photography Tips: The Equipment You’ll Need
The fantastic thing with product photos is that you can do a lot with a minimal amount of equipment. We’ll cover the basics below, and from there you can mold your own equipment list based on what works best for you and your products.
The Best Camera for Product Photography
If you’re striving for great product photos, your camera plays a key role. In the past, photographers needed to have a DSLR or other quality cameras in order to produce the caliber of photos that resonate with customers on a logical and emotional level. But the cost and complexity of these pro-grade cameras made it hard for beginners to get in the game.
Not anymore. As long as you have a modern smartphone (sorry, iPhone evangelists, but there are also some incredible Android options) you’ll be in great shape. Here are some of the top camera phones available:
- Samsung Galaxy S21
- Samsung Galaxy S21 Ultra
- Vivo X60 Pro+
- Xiaomi Mi 11 Ultra
- Sony Xperia 1 III
- Google Pixel 5a
- iPhone 13
- iPhone 12 Pro Max
- iPhone 12 Pro
- iPhone 12
- iPhone 12 mini
- iPhone 11 Pro Max
- iPhone 11
- iPhone SE
This list is hardly exhaustive, but highlights many of the phones to consider. In fact, some of the most famous Instagram, Amazon, and ecommerce photographers solely use these camera phones, and it’s often hard to tell the difference between their shots and an image shot with the most expensive DSLR cameras.
Support Your Efforts with a Tripod or Monopod
When it comes to product photography, you always want to make sure your image is stabilized. Though smartphone cameras do come with image stabilization, there’s still the possibility of camera shake when you are going handheld, which drastically reduces image quality and consistency
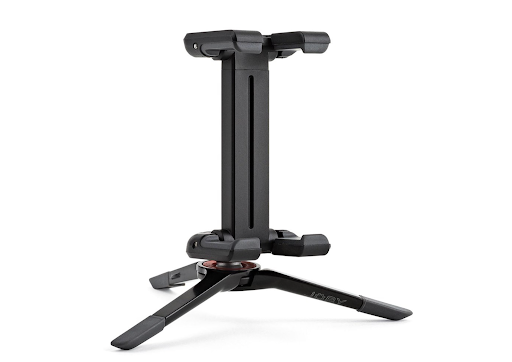
To balance out the shake, it’s best to use a tripod. There is a wide variety of tripods available. Start by investing in the basics and then move up from there as you identify additional needs. For example, you can get started with the GripTight ONE Micro Stand for about $25 (USD). It’s flexible and can easily be taken out and placed on the table in a variety of positions to get you that perfect product photo.
You can also check out monopods, which only have one leg as opposed to 3 with a tripod. Monopods let you shoot at slower shutter speeds than if you were hand-holding the camera, and they’re good when there is no room to set up a tripod. Some models have extra pieces that you can attach as tripod legs when needed, but we recommend that you don’t use a modified tripod like this as they’re not very stable and camera shake often becomes an issue.
The Best Backdrops Don’t Stand Out
Backdrops greatly enhance the appearance, vibe, and style of your product photos. Think carefully of the colors of your product and how they would work with whatever background you choose. Most professional ecommerce product shots are on white or black plain backgrounds because this allows the product to stand out and allow potential buyers to see details clearly on their screens.
”But wait,” you might be thinking, “I have an incredible Scottish tartan that would make a stunning backdrop for my next batch of product photos.” Yes, a vibrant tartan would indeed be visually stunning. And that’s the problem. You don’t want your background to compete with your product for the viewer’s attention.
You can use other solid color backgrounds instead of black and white if you think it’ll help the unique colors of your product stand out better. For example, in the image below, the blue background works with the white of the milk and the glassware. This image clearly wouldn’t have worked on a white background, and probably would have looked drab or harsh against a black one.
At home or in your office, you can use inexpensive objects like sheets, placemats, and poster boards for backdrops. You’ll find that the best results often come from the most basic backdrop choices.
Product Photography Lighting Makes All the Difference
One of the elements that quickly separates engaging photos from those that don’t get noticed is lighting. When you handle product photography lighting correctly, you don’t simply make it easier to see what’s in the photograph, but you enlighten the entire composition.
You can easily test this phenomenon on your social media feed. Go to Facebook and scroll down for about 30 seconds, making note of the photos that stand out to you. Chances are high that it’s the composition of those photos that most stood out to you. Sure, the subject matters. But you could easily be more drawn to a gorgeous photo of an everyday object like a burrito that your brother-in-law ate for lunch than a poorly lit photo of that same brother-in-law doing something epic like winning a new car in a raffle at work.
Each time you shoot, you’ll need to decide if you will use natural light or studio lighting. Here are some key advantages of going natural for product photography lighting:
- It’s free
- It’s easy to work with
- It doesn’t require extensive equipment
But there are potential issues that come with this natural approach. For starters, you’re limited to times when the sun is offering good light. And you also are limited in where you can shoot, as it’s recommended that you work close to windows that bring in unobstructed light. Basically, as much as you like working in your basement in the middle of the night, that’s an awful strategy if you hope to use natural light.
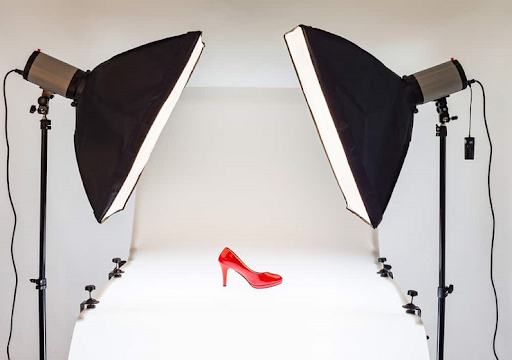
Your other option is to create beautiful images using studio lighting. In doing so, you’ll trade the convenience of natural lighting for the enhanced control and options afforded by electronic equipment.
Most photographers use a minimum of 2 lights in their product photography setups. The first light is positioned in front of the product, while the second light is used behind or above to eliminate shadows and highlight details. You can get a quality setup for less than $100 (USD), such as the VIJIM Tabletop LED Video Lighting Kit.
Quality lighting can make or break a purchase decision. While it takes time to get the lighting right in these situations, the good news is that once you’ve figured out the process, you can easily recreate it in the future. So the upfront time investment really pays off as you take more photos and refine your strategies.
More Tips for Incredible Ecommerce Product Images
Now that we’ve covered the basics, let’s take a deeper look at what will help you create stunning product images. Because it’s no accident when a photo truly shines. The photographer not only composed the shot well, but understood the nuances that really help images stand out from the crowd.
Go For Details
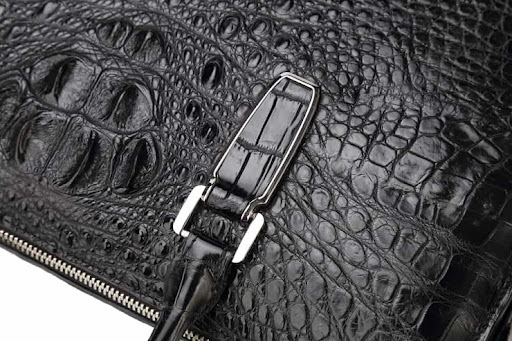
You want your shots to show the scale of your product, its fine details, and its function. If you wanted to show how thin your laptop is, you could compare it to the side of a penny. Show texture—smooth, rough, or sleek.
For example, let’s say you’re doing Amazon product photography for your new skincare line. With this kind of image, skin care products should be shown up close so customers can see the texture and get a better understanding of the experience your products offer.
When in doubt, error on the side of providing too much detail. In the photo below, the details help you understand not just what the item looks like, but what it feels like.
Of course, there will be times when details work against you. Wrinkles and lint on clothing or dust on product packaging might make your customers second guess their purchase.
A proactive approach can help ensure the details stay squarely on your side. If you’re shooting jewelry, polish it beforehand and get rid of any smudges. Going for glassware? Make sure to clean and dry it well. Your efforts to stage the best product image possible will increase the appeal and help to “finesse the finish.”
Explore Different Angles
Take photos from multiple angles to represent the product in a variety of ways. Try close-up macro shots for items like jewelry, skincare products, and food products. Experiment with shots that are styled and taken top-down for items like shoes and laces, or folded t-shirts or sweatshirts.
Get a variety of images and see what works best for your own unique product. You’ll be surprised how altering a simple thing like the angle of your shot can yield a drastically different result. And you’ll always find that it’s better to have numerous image options to choose from than to put all your eggs in one basket.
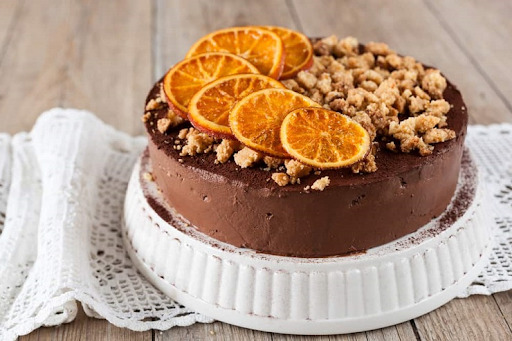
Look at how these 3 angles affect the presentation of the same dessert:


Let the Features Sing
Your product is truly special. Otherwise, you wouldn’t be spending time trying to capture photos of it. So you need to highlight your product’s features in the best ways possible. Show every color and style possible (you never know what a buyer is looking for). If your product has a unique function, use multiple photos to help customers understand how it works and why it will make their lives better.
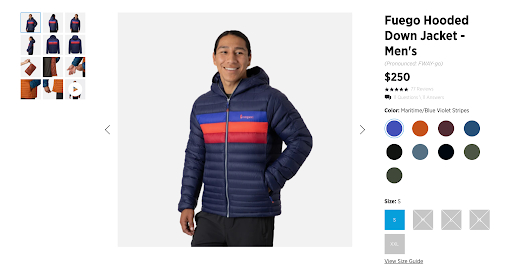
This hooded jacket shown below has 9 different color styles, so the seller offers multiple photos of each of those options. And you get to see the jacket at various angles to appreciate how each of those colorways would look.
While these studio photos of the jacket are helpful, buyers might also want to see the jacket in a natural environment. So the seller has an additional section of photos at the bottom of the page that collects customer-generated images that are as aspirational as they are beautiful.
You can provide application images such as these to your customers in a few different ways. The first option is to showcase customer photos. If you’d like more control of the style and content of the photos, you can have friends and family who look like your ideal buyer pose for some high-quality photos.
Another possible route is to hire freelance models via a website such as Upwork or The Freelancer Club. These professionals usually earn their pay (and then some) due to their ability to make your products look as good as possible.
Enlist Some Expert Help
Taking your advertisements to the next level requires great photography, as well as strong copywriting and robust strategies. You can learn how to create powerful advertisements that get even more powerful results by exploring our free training series. From optimizing your social media ads to writing headlines that stop readers in their tracks, these expert courses have been curated with your success in mind.
