“Another pop-up, that’s exactly what I was looking for!” said no one ever. Yes, pop-ups and other lead capture forms work. But boy can they be irritating, and the last thing you want is to frustrate your visitors before they even get a chance to get to know your company.
What do you do then? Give up on marketing? Go to law school?
Not so fast. There’s a more effective way you can collect leads without annoying your readers. Better yet, this way is more effective, and it’s even relevant to their interests.
What is this magical lead generation elixir I’m referring to?
Content upgrades.
If the name intrigues you, or you know all about them but feel like you’re not quite nailing them, read on. Here, you’ll learn everything about content upgrades, including lots of actionable ideas to start using them on your site today.
Plus, at the end of this article, you’ll find a bonus offer from yours truly that will help you set up your first, or at least one shiny and new, content upgrade.
Table of Contents
What is a Content Upgrade?
How to Find the Perfect Content Upgrade Idea
How to Create Your First Content Upgrade: The Start-to-Finish Process
Make Your Content Upgrades Relevant, Build Your List (FREE Content Upgrade Giveaway)
What is a Content Upgrade?
The key to list building is relevance. The more relevant your lead offer—the free-but-gated content piece you give out in exchange for the visitor’s email information—the easier it will be to get your visitors to sign up.
In the past, bloggers would sit down and define their target personas on which they’d base their lead offers. I’ll be the first to tell you that this process still works. There’s only one problem with it.
Imagine you visit a site about gardening because you want to make your garden look prettier (your neighbor’s garden is way nicer than yours, and you have got to do something about it).
Twenty seconds in, you’re reading a blog post about some innovative gardening ideas, until you get a pop-up offering you an ebook about the best gardening tools.
You think… 🤔
How would learning about the best gardening tools help me right now?
Not much.
The problem with lead offers is that, as J.J.R. Tolkien would say, there’s no one lead offer to rule them all.

Source
The reason lead offers don’t convert is that they often lack relevance. If the visitor was coincidentally reading about gardening tools, sure they’d find it useful. But that won’t be the case most of the time.
In this example, the offering that would excite your visitor is a checklist with a summary of the best ideas you can use in your garden. To jazz things up, the blogger could add some extra tips that weren’t in the post.
A content upgrade is simply an extension of what your blog post is about. And they are actually much easier to create than other lead magnets, which often come in the form of ebooks, webinars, video trainings, and more.
If you wrote about “Ways to cook pancakes with 5 ingredients or less,” the content upgrade could be a recipe.
If you wrote, “How to fix a clogged drain without calling a plumber,” your content upgrade could be a more detailed action plan than your blog post, and maybe even include a video of someone fixing a clogged drain. (Hopefully, you won’t ever have to go through that pain. 😅)
You don’t reinvent the wheel in every article; you only extend on the value it provides.
How to Find the Perfect Content Upgrade Idea
Creating the perfect content upgrade starts by defining what is it your visitor is trying to do with your content.
Some content upgrades, like checklists, tend to go hand in hand with certain content types—like tutorials and other action-focused articles. That’s not to say you should only use checklists for such types of content, but making your content upgrades relevant to the content type will make them more relevant.
The best content upgrades always play on the desired action the visitor wants to take when they arrive at your site. Checklists and cheat sheets work as content upgrades, because both summarize ideas in a way you can follow along easily to complete a desired action.
In your case, you want to consider the kind of value your content provides, and build the content upgrade based on that.
- If your visitor wants to lose weight, they’ll need recipes and workout plans.
- If your visitor wants to learn to code, they’ll need instructions, tutorials, and cheat sheets.
- If your visitor wants to make money on the side, they may want resource lists, templates, and checklists.
Can you use a checklist to teach someone how to code? Sure. Is it what the visitor wants? Probably not if they want specific training on how to code.
Remember: the best content upgrades are always tied to the action the visitor needs to take to get exactly what they desire.
Bonus Tip: Use This Google Analytics Hack to Find Your First Content Upgrade Idea
If you want to get started, but you have dozens of published blog posts and you feel like you can’t create content upgrades for all of them, don’t worry. Here’s a simple trick that will help you get started right now:
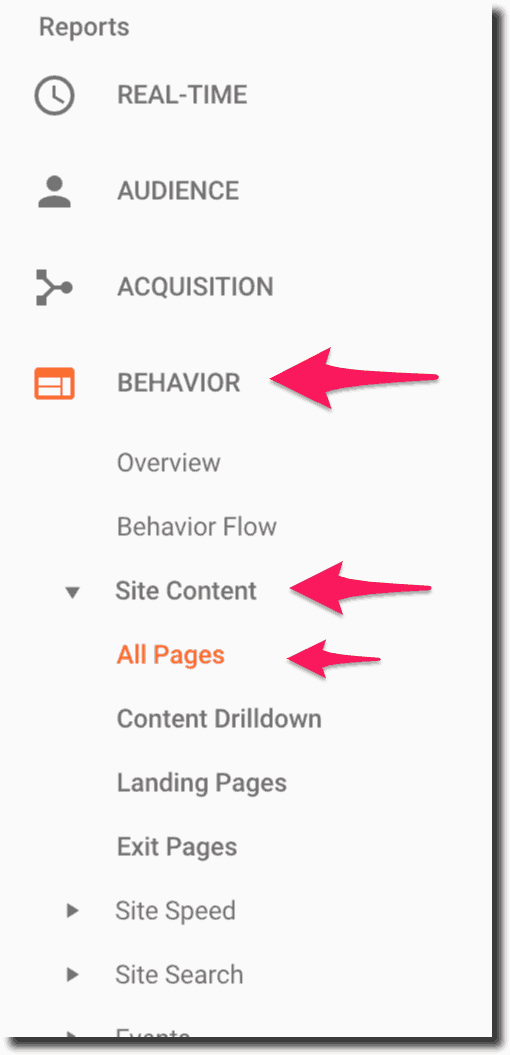
Open your Google Analytics. Go to Behavior > All pages.
Pick the top 10 posts you see and create content upgrades only for those.
The traffic those pages are getting will help you get the most number of subscribers with the least amount of effort.
Once you have tapped out the most popular posts, you can create content upgrades for the other posts as they start to gain more traffic.
Simple, right?
If you want to create content upgrades for the rest of your posts (the ones that are not getting traffic), you can, but working with the most popular ones will keep you focused on moving the needle with the least amount of work.
If you don’t have any traffic and you are just starting to build up your blog, wait until you get some traffic to see which content is the most popular (resonates the best with your audience) and then start building out content upgrades for those pieces.
Note that this is a hack, which means you can use this analytics strategy to quickly get some content upgrades on your blog and attract new subscribers. Having said that, I actually recommend planning out the content upgrade before you even write a blog post. The content upgrade should be a part your initial content discovery and planning phase for each blog post, so it tightly aligns with the topic.
Let’s dive into this approach in the next section. I’ll show you how to go from start to finish, preparing and planning the blog post and content upgrade combo, and how to create the actual content upgrade itself. Let’s get to it!
ATTENTION: Our course List-Building Mastery teaches you how to explode your email list from scratch and get your first 10,000+ subscribers. Enrollment is only open for a few days a year. Join our Free VIP waitlist to be among the first to be notified when we open enrollment again!
Want to Explode Your Email List and Get 10,000+ Subscribers? Join Our FREE VIP Waitlist!
How to Create Your First Content Upgrade: The Start-to-Finish Process
Based on personal experience, I recommend you start with the problem first, then write the article, and as soon as you finish it, you create the content upgrade as if it was an extension of the article itself. When you consider your content upgrade an extension of your blog article, you will have an easier time creating it. If you think of the content upgrade as an afterthought, you may procrastinate and never get around to it (trust me, I’ve been there too many times).
But first things first…
Step 1: Define the Problem Your Content is Solving
Before you create your first content upgrade, along with your blog post, you need to make sure you know the problems of your audience. Your blog + content upgrade will provide solutions to these problems.
In order to do so, you need to ask yourself a few questions that will help you dig deeper into the problem your content solves:
- What is the topic of the content you’re writing?
- Who is the reader?
- What problem is your content solving?
- What are you teaching them?
- What are you not teaching them (but could)?
These questions are all pretty basic, and if you have ever written anything in your life, you already answer these questions every time you write something—even if you do it unconsciously.
The last question, what you won’t be teaching, is crucial because it leads to the “extra value” your content upgrade will give your readers.
Let’s take a look at an example to see how this would work.
Imagine we were developing a content upgrade for the ecommerce growth hacks article we recently published.
The answer to each question would be:
- Topic: Ecommerce growth hacking
- Reader: Ecommerce business owners who struggle to generate sales
- Problem: Lack of time and knowledge to generate sales
- Teaching: We teach four tactics to generate more sales
- Not teaching: Tutorials on how to use each tool recommended
Read on to see how we implement these questions into the content upgrade creation process.
Step 2: Write Your Content
In this step, you are simply writing your blog post. You only need to do what you normally would: create the content. Since you already know the problem you are trying to solve, you now simply need to deliver the solution.
In this step, forget about the content upgrade and focus on creating a fantastic article that exceed your readers’ expectations.
With the analysis we did in the previous step, we would potentially create a content upgrade that offers step-by-step tutorials on how to use each tool we talked about, plus a few more tools that weren’t discussed.
We could position it as a detailed resource you can use to execute growth strategies, with tutorials included. This would be a logical extension of the article’s content and also solve the problem we identified (lack of time and knowledge to generate sales).
The key is to solve the readers’ problems and provide a free resource that allows them to continue their education on the topic and make their lives easier. Within that extended resource, you could offer:
- Screenshots
- Case studies
- Quotes
- Action steps
- Secret hacks
- Personal tips
- Stats that prove your point
- Videos
- Links to other resources
Step 3: Plan to Either Expand or Summarize Your Blog Content
There are two schools of thought in relation to creating content upgrades:
- Give the exact same value in the article but succinctly summarized or in downloadable form. This is the most common approach, due to the lower time commitment it demands. For example, if your blog post was an exhaustive list of 25 growth hacks, your content upgrade would be a checklist or summary of those strategies.
- Or, expand on the value given. This is the most effective, but it’s the least used because it takes more work to create additional content.
The extra time the latter approach takes can be exhausting, but it’s the difference between content that generate lots of subscribers versus content that does not.
Be honest with yourself. If you think you have the time to take the second path, do it. But if you are time-strapped, you can start with the first one and eventually move to the second one.
Step 4: Define the Type of Content Upgrade
There are many different types of content upgrades, the most common ones being:
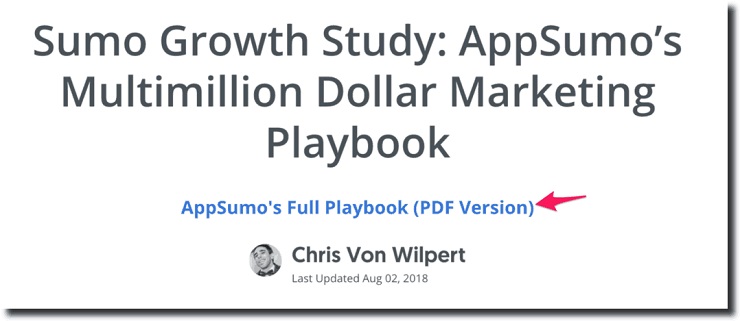
A Summary or Full Version of the Article in PDF Format
If you have written a long piece you think your readers won’t be able to read in one sitting, giving them the chance to download it and read it later is a good idea to use.
Cheat Sheet
Whenever your content is highly detailed and has many moving pieces your readers need to get to your solutions, a cheat sheet has everything they need in one place for future reference.
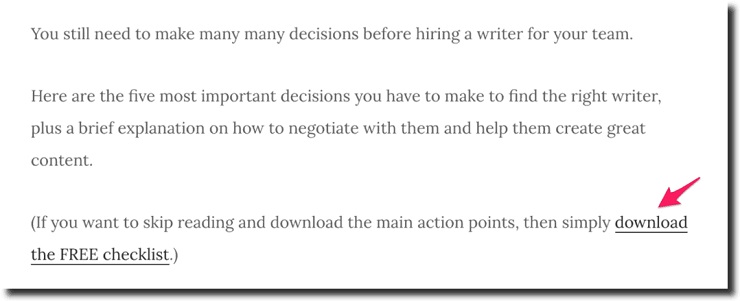
Checklist
If your article is action-driven and you want to help people organize the steps they need to take, a checklist is a perfect option.
Resource List
If your content has many ingredients, pieces, or elements, a resource list can help your readers find everything in one place.
Transcript of Audio Content
If your site features audio content, a transcript is a simple way to help your readers enjoy your content without having to sit down and listen.
Step 5: Create Your Content Upgrade
Now that you have your blog post ready and you know what type content upgrade you will develop, you need to take some extra time to develop the actual content that will make up your upgrade.
If you chose path #1 (summarizing your article), then simply paste your article into one of the content upgrade tools we’ll recommend later.
If you chose path #2 (the one in which you expand your content) here’s what you need to do.
Take the answer to the fifth question from Step 1 (what you won’t be teaching), and develop that content.
As we mentioned before, in the case of our ecommerce growth hacking article, we developed a small tutorial on how to use two or three of the recommended tools. We could have also created a list of resources we found useful to augment those tools.
Here are some other ideas you can use to expand on the value of your content piece:
- Expand on the insight
- Make it more actionable
- Make it easier to understand
- Show a step-by-step process of how you can implement it
- Show pictures of how it’s done
- Show videos of how it’s done
- Walk through examples of how it’s done
- Provide templates
- Provide transcripts
- Provide a mind map with all the insights or concepts
- Create a graphic explaining them
People tend to start at this step, figuring things out as they go. You are smarter that that, which is why you have developed the content before you started to create the actual content upgrade.
Content Upgrade Tools
The tools you will use to create your content upgrade will obviously depend on the type of content upgrade. For example, if you decide to record a video, then you will have to use a set of tools specifically for that content type.
If you decide to create a short ebook with extra tips, you will have to use another set of tools.
Whatever content upgrade type you decide to create, here’s a short list of tools you can use:
- Microsoft Word: The good ol’ Word can work great for ebooks and other content-driven upgrades. The only problem is that it won’t look very professional.
- iBooks Author: This is a more design-focused tool that will help you develop a professional-looking content upgrade.
- Canva: Perfect for graphics-focused content upgrades. It’s simpler to use than Adobe Illustrator and other professional-grade tools.
- Remarq: Great for creating ebooks, checklists, and transcripts on the fly.
- Beacon: Another handy lead magnet generation tool, perfect to create any kind of written content upgrades.
- Loom: If you are going to record screencasts or videos, you need this simple and free tool.
ATTENTION: Our course List-Building Mastery teaches you how to explode your email list from scratch and get your first 10,000+ subscribers. Enrollment is only open for a few days a year. Join our Free VIP waitlist to be among the first to be notified when we open enrollment again!
Want to Explode Your Email List and Get 10,000+ Subscribers? Join Our FREE VIP Waitlist!
Make Your Content Upgrades Relevant, Build Your List
If you’re struggling to build your list, content upgrades are your solution. They provide lots of extra value that your visitors will not only tolerate, they’ll love.
Better yet, they take less time to create than more generic lead magnets, and they will drive visitors to your list at much higher rates.
Now it’s time to make a decision:
What content upgrade will you create in the next 30 days?
This could define the future of your site! Let’s get to it!
Go through this article once again, write down specific action steps you will take, and share the approach you will use to create your first content upgrade in the comments below. And…
Here’s Your FREE Content Upgrade Giveaway (Valid until September 30th) 🎉🎉
Want to get started with your first content upgrade today? Add your best blog post in the comments below and I’ll suggest one killer content upgrade idea you can use. But hurry, this offer ends at the end of the month.
